

Kevin Merchant Photography Articles |
Hand Blending in Photoshop |
This short article describes a Photoshop tip for producing a panorama with a subject that involves movement. It is assumed that you are already familiar techniques involved with producing a panoramic series of images. |
|
March, 2012
I have read more than once that you shouldn't try to shoot a panoramic series of images where subject movement is involved such as ocean waves. I have sort of taken that as a personal challenge to push the boundary of a technique that I really like to use. To be sure, this is a method that is not always successful. But, it is a method for producing a high resolution image that would otherwise not be possible. Before jumping into the discussion, it's worth mentioning that field technique plays a critical role in capturing a series of images that can be converted to a panorama in the first place; especially where subject movement is involved. And for this to be successful part of that technique involves timing because of the movement. The less time that elapses between shots, the better. When slow shutter speeds are involved this is harder to control. In the case of ocean waves, I have found that it is better to start the first shot so that you follow the wave in with the camera. You will have a better chance to make smooth transitions. At the heart of this technique is the use of hand blending an image in areas where Photoshop simply cannot algorithmically make the right choices. Also, this method is best executed with a graphic touch-sensitive tablet such as products made by Wacom (my tool of choice). The best approach is to open all of the images as layers from Lightroom or Bridge. Select all of the layers. Then use Edit > Auto-Align Layers to make the first pass at a panoramic stitch. Usually, I start out with the Auto Projection selection to see what the result will be with Geometric Correction turned on. An iterative process may be required to find the best alignment method. Opening all images as layers gives you the option to go back with History rather than starting over in Lightroom or Bridge, and this is a time saver. |
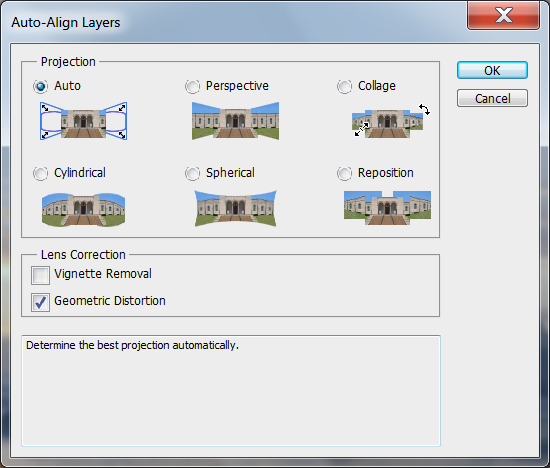 Auto-Align Layers |
|
Keeping all of the layers selected, use the Edit > Auto-Blend Layers tool with the Panorama Blend Method selection. So far so good. Depending on what is going on in the image, the awkward transitions from one image to the next may or may not be obvious. Here is where you can zoom in to the areas of motion to inspect. |
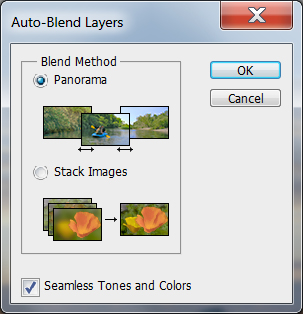 Auto-Blend Layers |
|
Usually, it's easier to make a copy of each resulting layer and fill the mask with Black so nothing from that layer is showing - Edit > Fill. I actually created a Photoshop Action to do this. Then I move all of the copied layers to the top of the layer stack. |
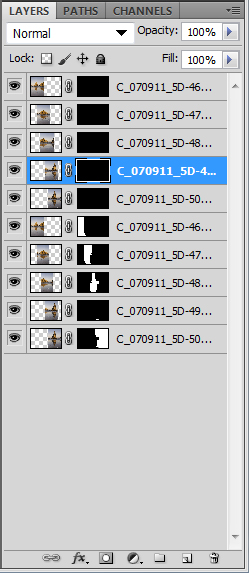 Copy Layers & Fill Masks |
|
Now you are ready to start sleuthing for those awkward transitions. It helps to be methodical in looking. A good starting point with the Brush tool is 0% Hardness selected. You paint with White on a layer mask of the copied layers to change transitions that you find in need of improvement. Brush size is important here - you only need to paint what is obvious and noticeable. Sometimes it helps to toggle the visibility of a layer to see the transitions (click on the Eye icon for the original layer). And, sometimes it helps to disable the mask of a copied layer to see what you have to work with in terms of what you can expose to make a better transition (right mouse click on the mask, and click Disable Mask). Use the History to toggle back and forth. I wish there was a keyboard shortcut for that (maybe there is and I don't know it). |
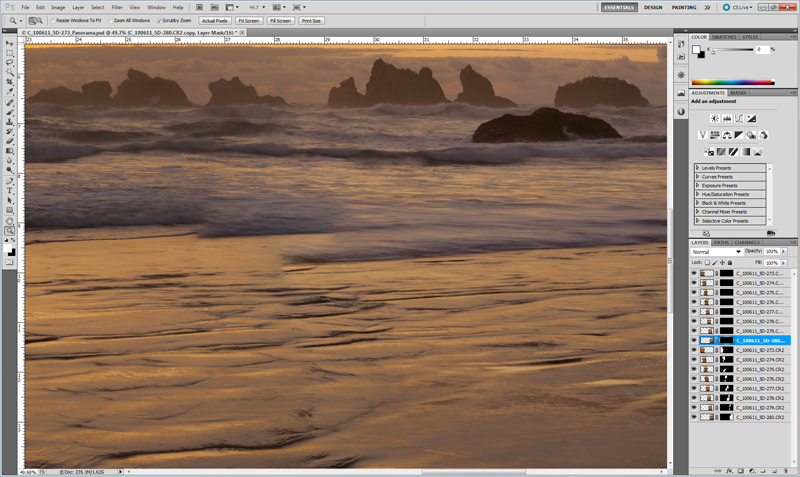 Before Changing Transition |
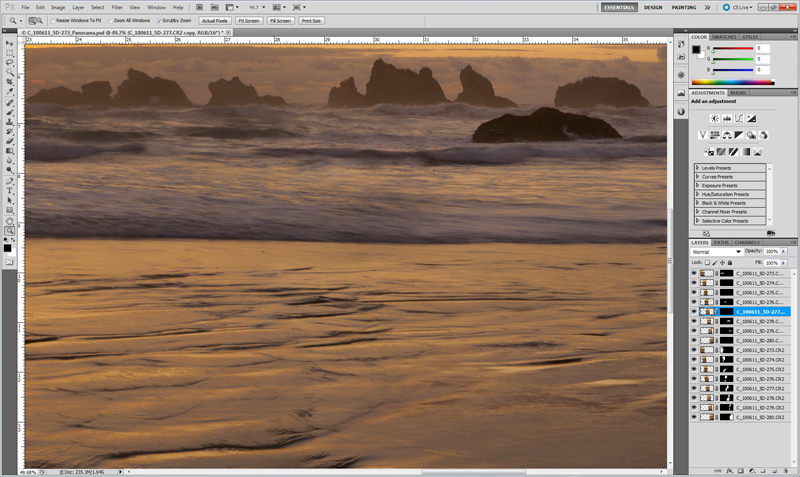 After Changing Transition |
|
It is an iterative process to find the best way to hide the transitions. The hand blending can require a fair amount of creativity to find what works. It can be tedious when there are a lot of layers and each layer needs a fair amount of "fixing". Once you are done you can delete any of the layer copies that did not need "fixing". There is no need to make the resulting file any larger than it will already be. One thing that plays into your favor is what I like to call "visual confusion". Our eyes are very good at pattern recognition. But in areas like ocean waves, there is a certain randomness that with careful blending, the eye will have difficulty discerning it. You can take advantage of that fact to merge side by side areas. Here is where it matters how much overlap you have between images. I always try to have 50% overlap. The movement from frame to frame will determine where to place the transition and how much area you have to work with. I call this a heavy lifting technique because there is no way to do much to automate it. The end result, however, is worth the effort. |
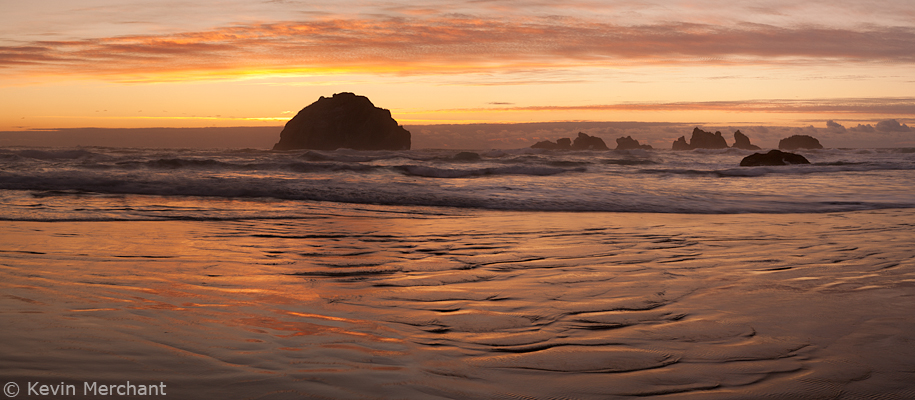 Final Image |
|
An alternative to using the Edit > Auto-Blend Layers algorithm is to do all of the blending by hand. If the images match closely enough, from a tonality point of view, this can actually be a better way since there is less guessing and you have entire control as to what needs painted in each layer mask. Add a layer mask to each image and you are ready to start painting on a White mask with Black. You definitely want to use a feathered brush and usually a large brush selection is better as it hides the brush strokes. In the areas where there is movement, a smaller brush size will be needed. |
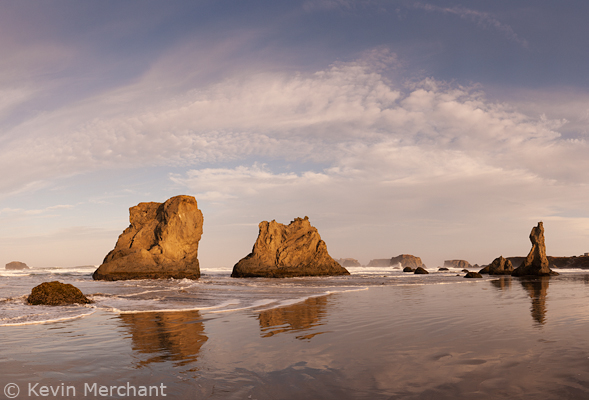 All Hand-Blended Image |
|
Sometimes, I simply cannot find acceptable transitions in side-by-side images. Time to move on to another image series. There is a reason why some have said to not even try. But when it works .... A useful keyboard shortcut - to change the brush size, use the [ key to make it smaller and the ] key to make it bigger. One additional Photoshop tip - if you have a wheel mouse you can set a Preference to let the wheel control zooming in and out. You do that a lot when making these kinds of adjustments as well as others. It can save a lot of repetitive motions. I'm on a mission to find more such short cuts. Who would have thought a little mouse could wear out your hand and wrist? Keyboard shortcuts still trump the mouse in many cases. |
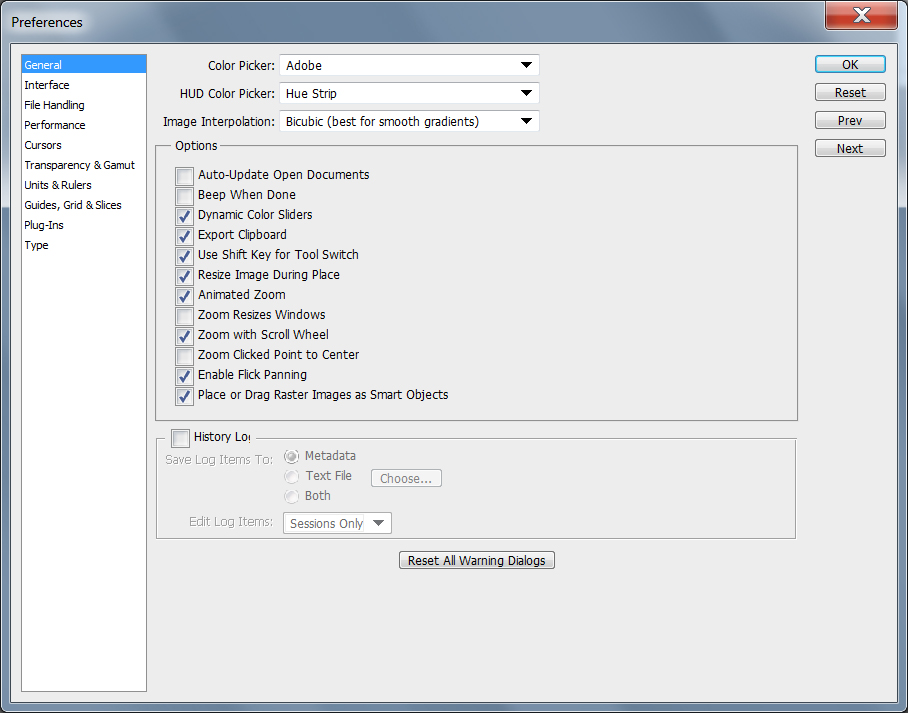 Preferences |
| Let me know if you find this article useful. Also, let me know if you have questions or comments. |
| Thanks for stopping by and be sure to check out the NEW section of the GALLERY for the occasional update. |
|
Resources: |
| © KEVIN MERCHANT PHOTOGRAPHY |
|
All photographs appearing on this site are Copyrighted
property of Kevin Merchant Photography and are protected under United States and
international copyright laws and have been registered with the U.S. Copyright Office. Contact Kevin Merchant Photography for licensing terms of all photographs appearing on this site. |